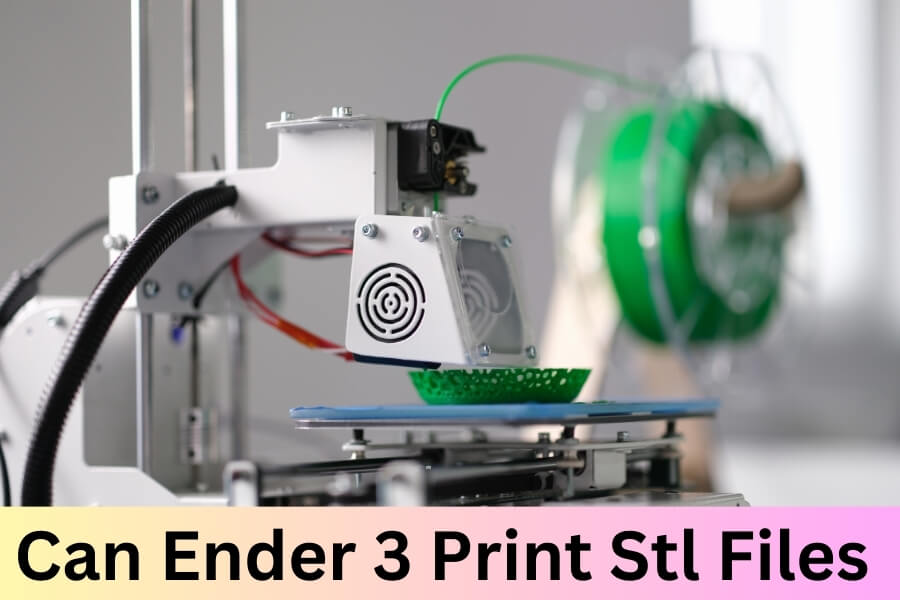
Yes, the Ender 3 can print STL files. The Ender 3 is a capable 3D printer that is compatible with the popular STL file format.
The Ender 3 is a widely used 3D printer known for its affordability and versatility. It has gained popularity among hobbyists and professionals alike due to its impressive print quality and ease of use.
One of the key features of the Ender 3 is its ability to print STL files, which are widely used in the 3D printing community.
STL (Standard Triangle Language) files are a common file format used for 3D printing, as they contain the necessary information about the 3D model’s geometry.
We will explore Ender 3’s capability to print STL files and discuss how to prepare and transfer these files to the printer for successful prints.
Unleash Ender 3’s 3d Printing Power
When it comes to 3D printing, the Ender 3 is a powerhouse that can bring your STL files to life with precision and efficiency. Understanding the capabilities of the Ender 3 is crucial to unlocking its full potential.
In this article, we will delve into the key features that make the Ender 3 an exceptional printer for handling STL files.
1. Understanding The Capabilities Of Ender 3
The Ender 3 is known for its versatility and reliability, making it a popular choice among both beginners and experienced hobbyists.
With its open-source nature, this printer gives you the freedom to customize and upgrade various components according to your needs, allowing for endless possibilities in 3D printing.
One of the standout features of the Ender 3 is its large build volume, which enables you to print objects up to 220mm x 220mm x 250mm in size.
his generous build area gives you the freedom to bring your creative ideas to life without the limitations of a small print bed.
2. Key Features That Facilitate Stl File Printing
When it comes to printing STL files, the Ender 3 comes equipped with features that make the process seamless and hassle-free.
Let’s take a look at some of its key features:
- Highly accurate printing: The Ender 3 utilizes a single extruder system combined with a heated print bed, ensuring precise and smooth prints every time. This accuracy ensures that even intricate designs and small details are captured with precision.
- Filament compatibility: This printer supports a wide range of filaments, including PLA, ABS, PETG, and more. Whether you’re looking for strength, flexibility, or vibrant colors, the Ender 3 can handle it all, giving you the freedom to choose the perfect filament for your project.
- User-friendly interface: With its user-friendly interface and intuitive controls, the Ender 3 makes it easy for anyone, regardless of their level of experience, to navigate through the printing process. Its LCD provides real-time information about the printing status, making it convenient to monitor the progress of your prints.
In addition to these features, the Ender 3 also boasts a sturdy frame, allowing for stability during the printing process, and a powerful extruder that can handle various filament types with ease.
Its affordability and community-driven support make it an excellent choice for beginners who want to dip their toes into 3D printing.
In conclusion, the Ender 3 is a highly capable 3D printer that can handle STL files with precision and efficiency. With its large build volume, accurate printing, filament compatibility, and user-friendly interface, this printer provides everything you need to bring your creative ideas to life.
So, unleash the power of the Ender 3 and take your 3D printing journey to new heights!
Can Ender 3 Print Stl Files? Configuration Tips
Are you a proud owner of an Ender 3 3D printer and eager to start printing STL files? Look no further!
In this section, we will discuss the necessary configuration tips to ensure your Ender 3 is ready to print those intricate and detailed STL files flawlessly.
From prepping your printer to optimizing the settings, we’ve got you covered!
1. Prepping Ender 3 For Stl File Printing
Before diving into the world of STL file printing, it’s essential to make sure your Ender 3 is properly prepared.
Here are some key steps to follow:
- Start by ensuring that your Ender 3 is correctly assembled and calibrated. This includes tightening screws and nuts, aligning the printer bed, and leveling the print surface.
- Next, ensure that the printer’s firmware is up to date. Firmware updates often provide bug fixes, performance improvements, and additional features that enhance the overall printing experience.
- Check the extruder and nozzle for any clogs or debris. Cleaning the nozzle is crucial to ensure proper filament flow during the printing process.
- Make sure the filament you plan to use is compatible with the Ender 3. Check the manufacturer’s recommendations for ideal filament types and temperatures.
2. Software Requirements For STL Printing
To print STL files on your Ender 3, you’ll need the right software tools.
Here’s what you should have:
- A slicing software: This is crucial for converting your STL files into G-code instructions that the printer can understand. Popular slicing software options include Cura, PrusaSlicer, and Simplify3D.
- A computer with the necessary system requirements to run the slicing software smoothly. Check the software’s documentation for specific requirements.
- A reliable USB cable or an SD card reader to transfer the sliced G-code files from your computer to the Ender 3.
3. Optimizing Printer Settings For Best Results
Now that your Ender 3 is prepped and you have the necessary software tools, it’s time to optimize the printer settings for the best possible results.
Here are some key tips:
- Configure the printer’s bed temperature and nozzle temperature according to the filament you are using. Refer to the filament manufacturer’s recommendations for the optimal temperatures.
- Ensure that the print bed is level and properly adjusted to provide a smooth and even surface for printing. This helps prevent adhesion issues and improves overall print quality.
- Experiment with different print speeds to find the optimal balance between speed and quality. Higher speeds may result in faster prints, but they can also compromise the final output.
- Consider adjusting retraction settings to minimize stringing and improve the overall print quality. Retraction helps prevent excess filament from oozing out during non-printing movements.
By following these prepping and configuring tips, your Ender 3 will be ready to print STL files with precision and finesse. Be sure to experiment, make adjustments, and enjoy the journey of turning digital designs into tangible objects!
Stl Files Decoded For Ender 3 Enthusiasts
As an Ender 3 enthusiast, you know that your trusty 3D printer is capable of bringing your digital designs to life.
But have you ever wondered how the printer interprets those intricate STL files? In this article, we’ll decode the anatomy of STL files and explore their compatibility with the Ender 3.
We’ll also address some common misconceptions surrounding these files and 3D printing, helping you make the most of your printing experience.
1. The Anatomy Of Stl Files And Their Compatibility With Ender 3
To understand the compatibility of STL files with the Ender 3, it’s crucial to grasp their anatomy. STL, short for Stereolithography, is a file format commonly used for 3D printing.
It represents the surface geometry of a 3D object using a collection of triangles, creating a mesh-like structure. Each triangle consists of three vertices (points in 3D space) and their respective normals (vectors perpendicular to the triangle’s surface).
When it comes to Ender 3 compatibility, the good news is that this popular 3D printer supports STL files seamlessly.
The printer’s firmware, like other slicing software, interprets the file to determine how to move the extruder and build the object layer by layer.
With the Ender 3’s reliable hardware and extensive community support, you can confidently print a wide range of designs offered as STL files on various platforms.
2. Addressing Common Misconceptions About Stl Files And 3d Printing
As with any technology, misconceptions and myths tend to arise.
Let’s shed some light on a few common misconceptions about STL files and 3D printing:
- Misconception: STL files can be printed directly without modification.
In reality, most STL files require some degree of preparation before printing. This involves slicing the models into layers, adding support structures if necessary, and adjusting various parameters to achieve optimal print quality. Slicing software, such as Cura or PrusaSlicer, plays a vital role in this process.
- Misconception: All printers can handle any STL file.
While the Ender 3 is a versatile printer, it’s essential to consider the printer’s build volume, resolution, and other specifications before attempting to print an STL file. Some designs may be too large or intricate for your printer to handle, requiring adjustments or using a different printer altogether.
- Misconception: Higher polygon count means better prints.
In truth, a higher polygon count doesn’t always guarantee superior print quality. While detailed models may require higher polygon counts, too many polygons can strain your printer and result in longer printing times. Striking a balance between detail and printability is crucial.
By understanding the anatomy of STL files and addressing common misconceptions, you’ll be well-equipped to take full advantage of your Ender 3’s compatibility with these files.
Whether you’re a beginner or an experienced 3D printing enthusiast, navigating the world of STL files and achieving impressive prints is within your grasp.
Ender 3 Print Quality With Stl Files
When it comes to 3D printing with the Ender 3, one of the most important factors to consider is the print quality when using STL files.
STL (Standard Tessellation Language) files are the most commonly used file format in 3D printing.
They contain a detailed, polygonal representation of an object’s surface geometry, allowing the printer to understand how to construct the model layer by layer.
1. Factors Affecting Print Quality When Using Stl Files
When using STL files with the Ender 3, there are several factors that can impact the print quality. It’s crucial to understand these factors and how they can be optimized to achieve the best possible results:
1. Printer Settings
The Ender 3 comes with a variety of settings that can be adjusted to optimize print quality. These include the layer height, print speed, nozzle temperature, and infill density. Finding the right balance between speed and quality is key to achieving optimal results.
2. Printing Materials
The type of printing material used can significantly impact the print quality. Different materials have their own unique properties and characteristics, such as strength, flexibility, and heat resistance. It’s important to choose the appropriate material for your desired print quality and application.
3. Model Design
The design of the model itself can also affect the print quality. If the model has intricate details, overhangs, or unsupported sections, it may require additional supports or modifications to ensure a successful print. Additionally, ensuring the model is properly oriented and positioned on the print bed can also improve overall print quality.
2. Troubleshooting Common Issues With Stl Prints On Ender 3
Despite taking all necessary precautions, there may still be issues that arise when printing STL files on the Ender 3.
Here are some common issues and troubleshooting tips to help you overcome them:
1. Warping and Adhesion Problems
Warping occurs when the printed object detaches from the print bed during the printing process. To prevent this, ensure that your print bed is properly leveled and clean. Using adhesion aids such as a raft or brim, or applying adhesive solutions like glue stick or hairspray, can also improve bed adhesion.
2. Layer Lines and Inconsistencies
Layer lines and inconsistencies can occur due to various factors, including incorrect print settings or issues with the printer’s mechanical components. To address this, double-check your printer settings, ensure proper cooling during the print, and regularly maintain your Ender 3 by cleaning the nozzle and lubricating the moving parts.
3. Stringing and Oozing
Stringing or oozing refers to the thin strands of filament that can appear between different parts of the print or across areas with gaps. To minimize stringing and oozing, adjust retraction settings in your slicing software, reduce print speed, and consider using a prime tower or ooze shield feature if available.
By addressing these common issues and optimizing the various factors that affect print quality when using STL files, you can enhance the overall print quality of your Ender 3 and create amazing 3D prints.
Seamless Ender 3 Workflow For Stl Printing
Looking to dive into the world of 3D printing with your Ender 3? Fantastic! The Ender 3 is a popular and capable 3D printer that can handle STL files with ease.
In this post, we will guide you through a step-by-step process for printing STL files on your Ender 3 and provide some helpful tips for maintaining consistent print quality. Let’s get started!
1. Step-by-step Guide To The Stl File Printing Process
Here is a simple breakdown of the steps involved in printing STL files on your Ender 3:
- Choose or create your STL file: Starting with a high-quality STL file is crucial for a successful print. You can either download pre-designed models or create your own using 3D modeling software.
- Prepare your print bed: It’s essential to ensure your print bed is clean and level. Use a piece of printer paper to check the bed’s leveling, making adjustments if necessary.
- Slice your model: Slicing is the process of converting your STL file into G-code, which the Ender 3 can understand. Use slicing software like Cura or PrusaSlicer to set print settings such as layer height, print speed, and support structure.
- Transfer the sliced file to your Ender 3: Save the G-code file to an SD card or connect your computer directly to your printer using a USB cable. Transfer the file to your Ender 3, ensuring it’s in the proper location on the SD card.
- Start the print: Insert the SD card into your Ender 3, select the file, and start the print. Make sure that the printer is at the correct temperature and that the extruder is primed before the print begins.
- Monitor the print: While the Ender 3 does a fantastic job on its own, it’s essential to monitor the print periodically. Keep an eye out for any signs of issues such as filament jams or warping. Address these issues immediately to avoid any print failures.
- Remove the finished print: Once the print is complete, allow the print to cool before carefully removing it from the print bed. Use a spatula or scraper to gently lift the print off the bed to avoid damaging it.
2. Tips For Maintaining Ender 3 For Consistent Print Quality
To ensure consistent and high-quality prints with your Ender 3, we have compiled a list of helpful tips:
- Regularly clean and level the print bed: Keeping your print bed free from debris and properly leveled is crucial for successful prints.
- Calibrate the extruder: Proper extruder calibration ensures accurate filament flow and prevents under or over-extrusion issues.
- Check filament quality: Use high-quality filament to minimize the chances of clogging or extrusion problems.
- Upgrade the firmware: Consider updating your Ender 3’s firmware to the latest version to access new features and optimize performance.
- Monitor print temperature: Ensure that the print temperature is within the recommended range for the filament you are using. This helps prevent issues like stringing or poor layer adhesion.
- Keep the printer well-maintained: Regularly clean and lubricate the printer components. Check belts, screws, and motors for any signs of wear or damage.
By following these steps and implementing these maintenance tips, you can enjoy a seamless and satisfying printing experience with your Ender 3. Happy printing!
Frequently Asked Questions For Can Ender 3 Print Stl Files
Can The Ender 3 Printer Print Stl Files?
Yes, the Ender 3 printer is fully capable of printing STL files. This popular 3D printer model supports various file formats, including STL, which is one of the most widely used formats for 3D printing. So, you can conveniently print your STL files with the Ender 3 printer.
What Is The Process To Print Stl Files On The Ender 3 Printer?
Printing STL files on the Ender 3 printer is a straightforward process. First, ensure that your STL file is properly sliced using slicing software like Cura. Then, save the sliced file onto an SD card and insert it into the printer.
Finally, select the file from the printer’s menu, adjust any necessary settings, and start the printing process.
Can The Ender 3 Printer Handle Complex Stl Files?
Yes, the Ender 3 printer is capable of handling complex STL files. However, it is important to note that the print quality and success rate may vary depending on factors such as file size, complexity, and printer settings. It’s always recommended to optimize your STL files and adjust printer settings for best results with complex models.
Conclusion on Can Ender 3 Print Stl Files
The Ender 3 is a highly capable 3D printer that can effectively print STL files. With its user-friendly interface, affordable price point, and high-quality output, it has become a popular choice for both beginners and professionals alike.
Whether you’re looking to create functional prototypes or intricate designs, the Ender 3 is a reliable option that won’t disappoint.
So, don’t hesitate to unleash your creativity and bring your ideas to life with this impressive printer.
